

By Paul Dunwell, writing for EasyFrame
© Copyright EasyFrame 2018
What this article is about
'Frame Academy I' gave a run-down of essential terminology. 'Frame Academy II' is a step-by-step idiot's guide to making a picture frame. It will also help you understand the processes involved if you have your frames made to your specifications by someone else. (And yes, there will be more sequels, but you won't have to live forever to read them!)
What you'll need
- Cardboard backing board
- Wood, plastic or metal to make the frame
- Glass or plexiglass
- A mitre box and a hand saw
- A steel rule and a steel tape measure
- A hammer
- A set square or similar
- A set of 4 right-angle clamps
- A craft knife, scissors or a backing board cutter
- A jigsaw and safety goggles
- Sundries: PVA glue, tacks, double-sided tape, sandpaper and a sanding block, screw-in eyes, polyester cord, microfibre cloths and white 'archive' gloves
There is a companion article on the EasyFrame site that covers the equipment and costs in more detail. See www.easyframe.co.uk/NewsArticle/diy-picture-framing-where-do-you-start
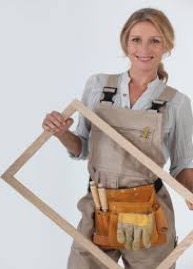
Backing the frame
- Measure the backing board. This is the paper or card border that goes inside your frame. Its width should be between a quarter and a third of the width of the artwork.
- Measure the artwork. Add double the border width to its height and to its width to get the outer dimensions that will go in the frame. The inner aperture needs to be slightly smaller than the artwork.
- Cut the outside edges. Use scissors, a knife or a backing board cutter, with a right angle, a ruler and a marker, to trim the board to the dimensions you've worked out.
- Cut the aperture. Use a suitable tool to cut it cleanly, slightly smaller than the artwork.
- Place the artwork. Working with the artwork and board face-down, centre the artwork in the aperture and fix it with double-sided tape.
Constructing the frame
- Choose materials. Wood, metal, plastic, glue and tacks should suit the artwork, be of suitable quality and fit the surroundings in which the picture will hang.
- Measure the frame. Its dimensions follow from the outer dimensions of the backing board. The length to cut is the length of the board, plus double the small clearance around it, plus double the width of the frame material.
- Cut the frame. Cut two widths and two lengths, checking carefully first that you've made no mistake. Then trim each end to a 45-degree angle. For that you need a mitre. They are cheap, and going without one is a false economy.
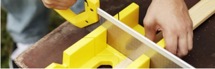
- Cut the rebate. This is the lip inside the frame that stops the glass falling out of the front. Alternatively, attach a thinner frame on the back to sandwich the glass.
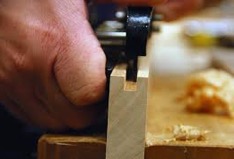
- Finish the frame. Paint, varnish or stain it before you assemble it, let alone insert the glass and artwork. Think about colour and surroundings. Test the finish on offcuts first and wait for it to dry before deciding.
- Assemble it. Make sure everything is square and clamp it before you glue anything. Wait for the glue to dry before you tack through the corners. There should be no gaps, but use filler if there are.
- Fit the glass. Glass usually needs to be cut by specialists, but plexiglass is not too hard to cut yourself.
- Fit the artwork. With the frame face-down, put the image and backing board in, make sure they're centred, and use tacks or similar to close the back.
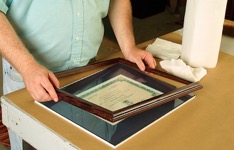
Finishing touches
- Decorate the frame. You could use gilt or some embellishment that complements the artwork. It's worth labelling the back, especially for a photo. Say when it was taken and who is in it!
- Hang it. Once the frame is finished and dry, the usual method is a polyester cord (which won't stretch as nylon does) run across the back between two screw-in eyes.
Conclusion
DIY framing isn't always cost-effective, and if you bungle it, it can become very expensive. Whether you have a go will depend on whether it will be fun and teach you something. DIY usually is fun, and for those prepared to take full responsibility for their own work it can grow into more than a hobby.
The alternative is to go straight to a professional framer like EasyFrame, for the whole job or just the part that has left you jittery. EasyFrame can also certainly supply much of what you need to do the job yourself.
EasyFrame is on 01234 856 501 and sales@easyframe.co.uk.