

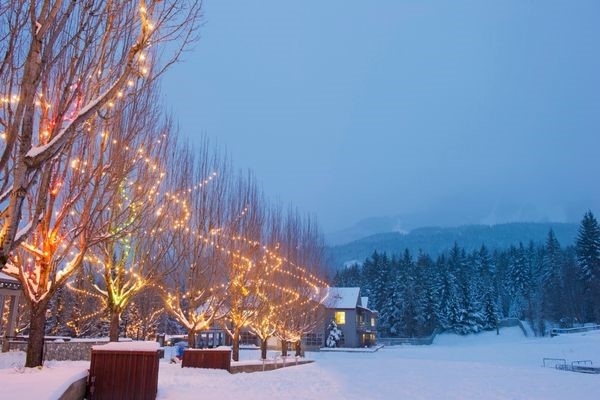
Every December brings festive joy, new memories and the chance to start new traditions. It is also a month when everything keeps changing, from the weather and the decorations to who turns up for Christmas dinner. Photography is the best way to hold on to those fleeting moments, so here is how to take good Christmas photos.
Indoors: get the set-up right
1. Use natural light
Fairy lights give a festive glow, but daylight is the key to really good winter photos. Work near windows and doorways that let plenty of light in. Outdoors, the hour after sunrise and the hour before sunset give the most attractive light.
2. Experiment with angles
Get down low and shoot up at the decorations, or look up into the tree from underneath. There are plenty of viewpoints to try.
3. Make the most of snow
Snow is rare in the UK, but if you are lucky enough to have a white Christmas, get outside. A snowy scene is the perfect festive backdrop. Without snow, look for frost and misty mornings.
4. Capture the details
Small details often make the picture. Take close-ups of decorations on the tree and presents under it, and of the family together. Those are the photos you will treasure in years to come.
5. Photograph the food
Christmas dinner captures the spirit of the day. Photograph the whole spread, or the one dish that matters most to your family, before everyone tucks in.
Outdoors: photographing Christmas lights
Wait until dusk
Many people think Christmas lights are best photographed in complete darkness. In fact the contrast is then too great for the camera. Expose for the lights and everything else goes black, so that you cannot tell where they are. Expose for the surroundings and the lights burn out.
At dusk there is still a faint glow in the sky. It lights the buildings and trees just enough to give the lights a setting, and the pictures are far better for it.
Turn off the flash
Flash has its uses, but not here. In low light it flattens the scene, drowns the glow of the lights and makes harsh shadows. Use a tripod and a long exposure instead.
Low ISO, long exposure
With the camera on a tripod, set a low ISO and lengthen the exposure. A low ISO gives a clean picture with little grain, and the long exposure gathers the detail that would otherwise be lost in the dark. A common mistake is to set the ISO too high, which gives noisy, speckled pictures.
Choose the aperture to suit the picture
A wide aperture (a small f-number) lets in more light and gives a shallow depth of field, so the background blurs. A narrow aperture (a large f-number) gives a greater depth of field, so more of the scene is sharp. Choose according to the picture you want.
Bokeh
Bokeh is the name for the soft, blurred discs of light in the out-of-focus part of a photo. It gives a dreamy look, and it is made in the camera, with no editing.
Set the aperture as wide as it will go. Put your subject close to the camera, with the fairy lights well behind. Focus on the subject, and the lights will melt into glowing circles.
Burst mode
Christmas moves fast. Burst mode takes several photos in quick succession, so you can catch the paper flying and the look of surprise without fuss, and choose the best frame afterwards.
Conclusion
Christmas photography is fun, and with these tips your pictures will stand out. Pick the right time of day, experiment with exposure and let burst mode do the hard work. You may find a new hobby.
When you have your favourites, our made-to-measure picture frames will show them at their best, and we are glad to advise on the right one.
Call EasyFrame on 01234 856 501 or email sales@easyframe.co.uk. We are happy to talk it through even if you do not want to buy.