

By Paul Dunwell, writing for EasyFrame
© Copyright EasyFrame 2019
What this article is about
Earlier 'Frame Academy' pieces covered terminology, making a frame, gilding, choosing a type of frame, reusing old frames, choosing colours, hanging heavy artwork, hanging at the right height and hanging on the stairs. 'Frame Academy X' looks at picture rails.
If your home or workplace already has picture rails, you'll probably know the benefits. If not, or if you haven't understood how useful they can be, here's the place to learn, and to find out how to use them to best advantage.
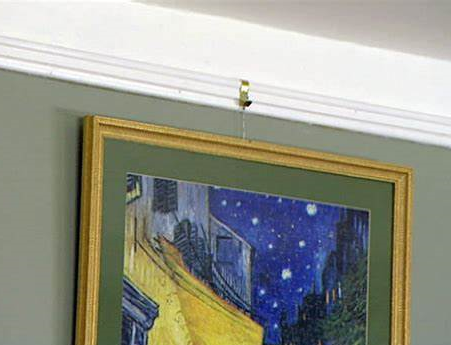
Why picture rails are a smart solution
Most of us live in modern homes, and when we hang artwork or photographs we almost always fix them directly to the wall. Older homes often have architraves (the finish around doors and windows), dado rails (which run around the lower part of the room, usually between chest and shoulder height) and picture rails.
In older buildings a picture rail could sit anywhere from a few inches below the cornice or coving to a foot or two below the top of a door. They have fallen out of fashion because modern ceilings are lower, and builders see them as a frill that can be trimmed.
But picture rails are a blessing:
- You don't have to make holes in the walls.
- You can rearrange or replace your artwork in moments, without tools.
- They give heavier work a security that is missing in new homes with mostly stud walls.
On that basis they are worth installing in your home or workplace, modern or not.
What height should a picture rail be?
Opinion is divided. Some cite formulae such as 2/7 of the wall height down from the ceiling. Others say very close to the ceiling, though with high ceilings and small works that leaves long cords on show. Others suggest proportions that echo the architraves and dado rails, or level with the top of the door frame. I think they're all wrong.
Picture rails are designed for flexibility, but it is worth starting from the work you will hang, including the biggest piece you are ever likely to hang, and its size in proportion to the room. Ideally you want the centre of each work at common eye level. You don't want to see more cord than necessary, bearing in mind that works of different sizes will hang side by side. And you never want a work so big that its top has to sit above the rail.
One way to decide:
- Cut a lightweight place-marker for each work, in newspaper or similar, to the same dimensions.
- Fix them to the walls with Blu Tack or a tape that won't mark, and move them around.
- When you've agreed where the first works will go, and allowed for anything bigger in future, decide the height of the rail. The biggest frame will reach highest and could hang directly on the rail, or you may want to see some cord, as with the others.
- Leave the markers up as reminders until the real works are ready to hang.
You can hang every work directly on the rail with no cord. But if the frames are different sizes, their centres cannot all be at eye level. The alternative is to have the lot reframed to identical outer sizes, whatever the size of the work inside.
How to fit a picture rail
- Mark the wall. Assume nothing is level. Measuring down from a ceiling or up from a floor could invite disaster. Ideally use a spirit level together with a laser.
- Cut the moulding. You need internal and external mitre cuts. Measure twice, cut once!
- Fix it. Fixings should be no more than a metre apart. Countersink the screws so they are easy to hide.
- Disguise joints and fixings. Filler works well. Rub it down, then paint it.
Traditionally the wall above a picture rail is the same colour as the ceiling. If you follow that, paint the wall above (and possibly below) the rail's position first, then install the painted rail over the join between the two colours.
Hanging work on your picture rail
You will need D-ring or strap hangers for each work. Make sure they are strong enough and the right length for where your place-markers show the work should hang. Fix them towards the top of the back of the frame. Use S-shaped picture-rail hooks or similar. Put all the hooks on the rail before gently trusting the full weight of the work to them, then check the frame is straight. A spirit level on the top works well.
Conclusion
Hanging artwork in the right position matters, because you and your guests or colleagues want to enjoy it. Picture rails can make it easier.
If you are framing something precious, it's always worth going straight to a professional framer like EasyFrame for advice. They can do the whole job or help with the part that has left you racked by self-doubt. They can help you unify your collection, supply hooks and hangers as well as mounts and frames, and provide all you need to make and use picture rails.
EasyFrame is on 01234 856 501 and sales@EasyFrame.co.uk.